DIY – The difference between a head pin and an eye pin
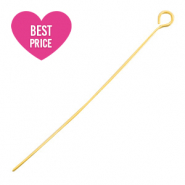
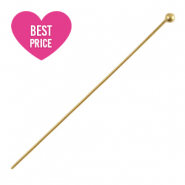
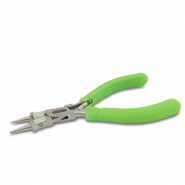
00:00 What do you need: Head pin Eye pin Nose pliers Jewellery pliers Beads 00:03 Hello and welcome to a new DIY video. Today I’m going to show you the difference between a head pin and an eye pin. They don’t just look different; they also have slightly different functions. Here you see the head pin with a small ball at the end, which gives a neat finish. With a head pin, you can easily turn a bead into a charm. Head pin 00:13 Step 1: Slide a bead of your choice onto the headpin. 00:19 Step 2: Cut the head pin so that just under one centimetre remains. 00:24 Step 3: Bend the head pin. 00:26 Step 4: Hold the top of the head pin with the nose pliers and curl it into a neat loop. 00:36 Now let’s move on to the eye pin. This one already has a loop and is perfect for creating a connector. 00:42 Step 1: Slide the bead onto the eye pin. 00:44 Step 2: Cut the eye pin so that just under one centimetre remains. 00:53 Step 3: Hold the top of the eye pin with the nose pliers and curl it into a neat loop. This way, you easily create your own connector. You can now attach your charm to something, such as an earring or a charm bracelet. The connector can be used between a bracelet or a necklace. Now you know the difference between a head pin and an eye pin!